Vaulting (Arched Ceiling)
If you wish to use this method of construction, I would recommend
that you make the room to fit the arches and not the other way round.
There are a number of different styles of construction that can be done using this method,
In this
tutorial I will explain how to make a five-sided arch
Short cuts
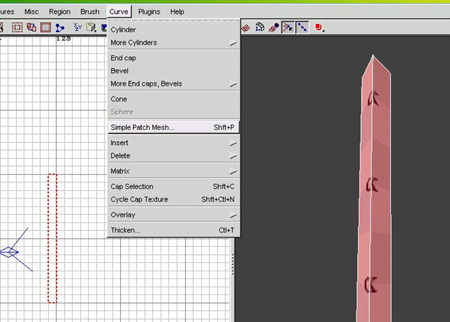
Select brush, shift + s = simple patch mesh
Select patch, ctrl + I = invert
Select object/objects, v = select vertices
This tutorial involves a lot of swapping between different windows and the moving of vertices, take careful note of the view in use for each step (x, y, z views).
It will also be necessary to change grid size. I will start with the grid set to 4.
Step 1. ZX view.
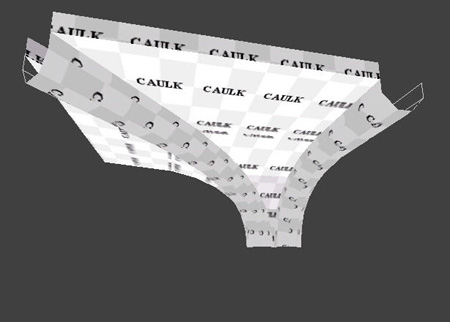
All of the vaults are constructed using a "simple patch mesh". To make a simple patch mesh you need to first make a brush 8 x 8 x 128 (x, y, z), go to view zx and make it a simple patch mesh, you will be prompted for a patch size, all patches used in this tutorial are 3 x 3(default) in size.
Tv1
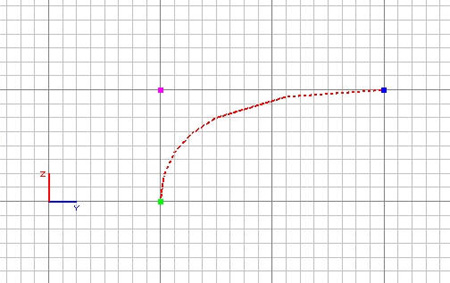
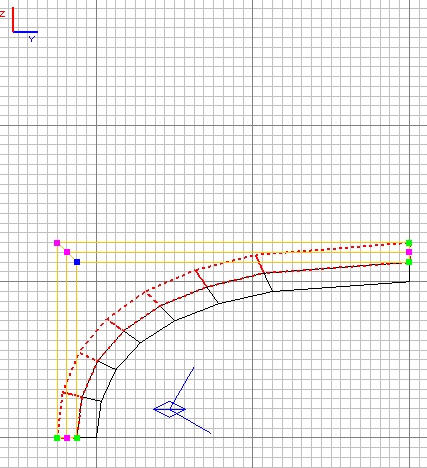
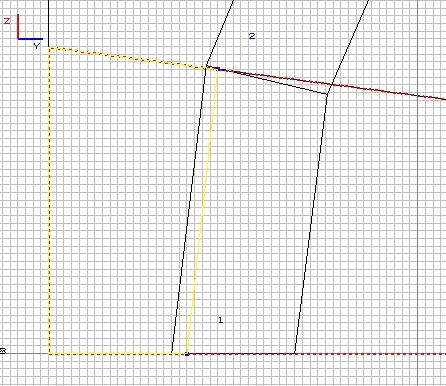
Step 2. ZY view.
We will use this first patch to make the span of the center arch.
With the patch selected, select vertices, In the zy view left click on the top vertices, it will turn blue along with the two vertices that are behind it. Move the selected vertices to where you want the center of the span.
Press esc once to deselect the highlighted vertices.
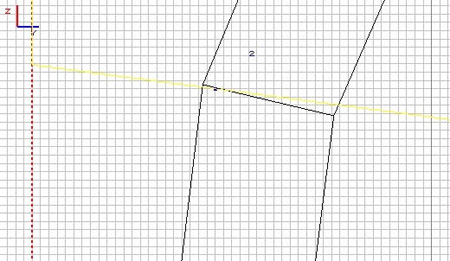
Now move the middle vertices so the yellow lines all run to a right angle.
In the perspective view have a look at the arch, you may need to invert the surface texture.
Tv2
With all the simple patch mashies used to make the aches in this ceiling, once the ends are in place, these middle vertices must be carefully moved so that the yellow lines all run to a right angle. All the lines must also run parallel to the others in the patch.
If the yellow lines are not as described the finished patches will no line up!
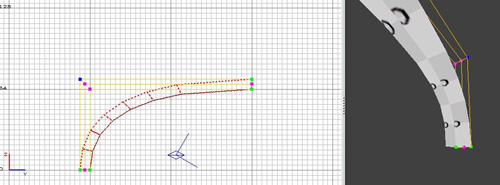
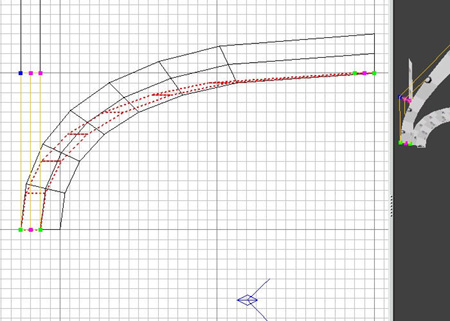
Step 3. ZX view.
Make a simple patch mesh, same size as the first, and place it next to the center span.
Tv3
YX view
Select vertices and align the patch to 45 degrees as shown.
In the perspective view, select each of the top vertices in turn and move so that in the yx view it is no longer above the below vertices. Then in the yx move so it is at the end of the arch, go to the zx view and realign as necessarily.
Once this is done, set the middle vertices.
Your second arch face should now run at a 45 degrees angle and be aligned with the center span.
Tv4
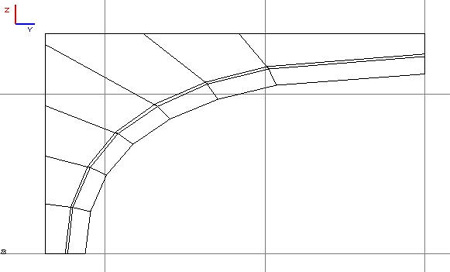
Step 4. ZY view.
Make a simple patch mash like the others and place next to the last span made.
Select one vertex at a time and move each so this arch sits around the last one.
Tv5
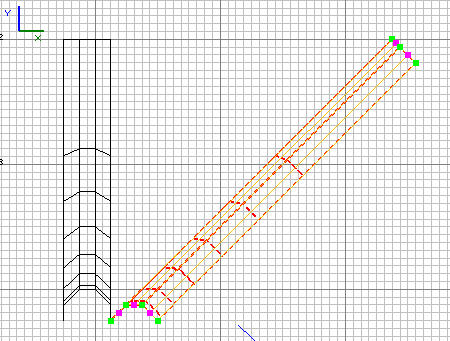
Step 5.YX view
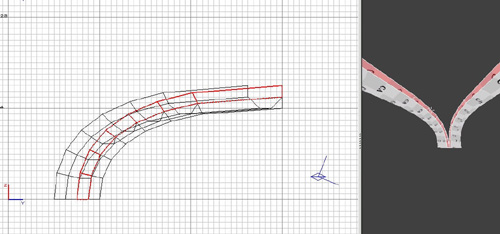
Select the second and third arch made, then copy them and flip the two new spans on the x-axis. Align them with the other side of the arch.
Tv6
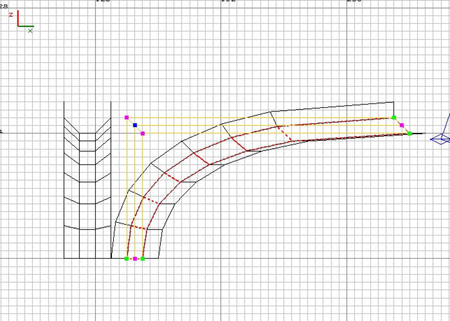
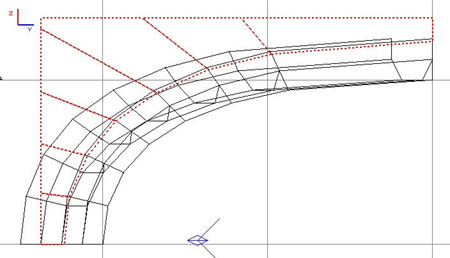
Step 6. ZY view.
Make a new simple patch mash and place it along side the completed first arch. In the yx view select the vertices and align the patch as shown in tv7.
Copy and align two more simple patch mash so your map now looks like tv8. Keep the last patch selected, this will be the span.
Tv7 tv8
tv8
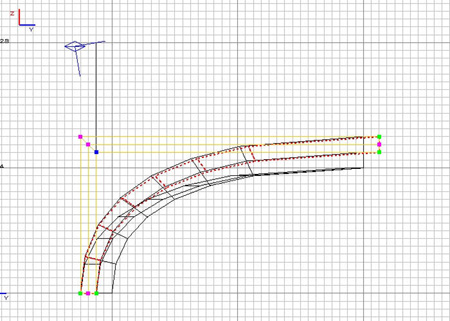
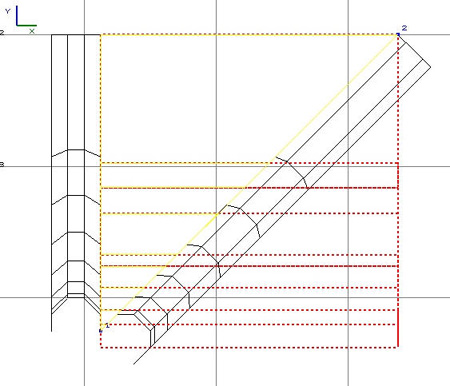
Step 7. YX view.
Select the vertices and double left click on one of the three visible vertices, they should all turn blue. With all three top vertices selected drag them so they come up to the centerline of the center arch at an angle of 45 degrees (z-axis) from the center arch.
Tv9
YX view.
Realign the middle vertices.
Tv10
Step 8. YX view.
Select the first simple patch mash you made in step 6(tv7).
Select the vertices and double left click on one of the three visible vertices, they should all turn blue. With all three top vertices selected drag them so they come up to the centerline of the center arch at an angle of 45 degrees (z-axis) from the center arch.
ZY view.
Realign the vertices as shown in tv11.
Tv11
Step 9. You will need to use all three views.
The second patch you made should be made to fit between the other two by moving each vertex in turn to the right place.
Tv12
Select all three arches, select vertices and move the end of the arch so that it realigns to the centerline of the center arch.
Tv13
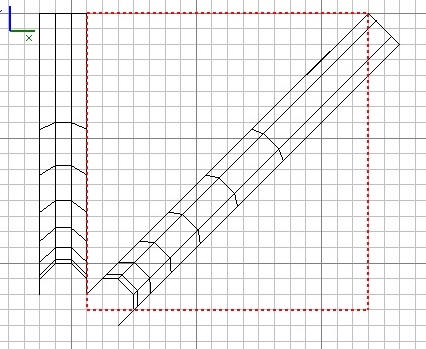
Select the first two arches made and in the yx view copy and flip on x-axis, rotate once on z-axis and align with other side of the arch.
Now if you select the two facing arches and look at the zy view, both should be now aligned.
Tv14
Step 10.
Select all ten patches and resize texture to natural.
Making the ceiling
This technique will result in some overdraw, but it will give you the look you require in game.
Step 11. ZY view
First select one of the two facing arches, copy it and move to a position clear of the other arches.
We will be using this as a guide to clip the ceiling.
Cel1

Next we need a brush 8 units higher that the arches and that fits between the spans
Cel2
Cel3
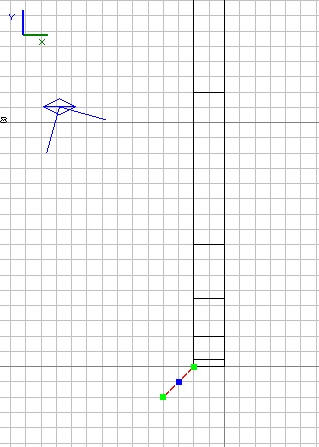
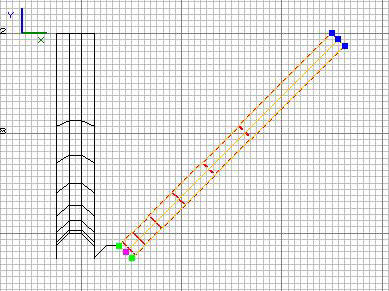
Step 12. ZY view.
Now we have to split this brush to make the curved ceiling. Change your grid size to .5.
Select the clipping tool and but your first point in the bottom right hand corner of the brush. The next point place two squares (1 unit) in from the outside edge of the arch as shown, on the first split of the patch. If the patch and grid do not align, don?t worry, so long as you use the same point when you start cutting the arch, It will work.
Cel4
Repeat until the brush is split in line with the arch. In game this arch will be split again doubling the number of verities, if you want the curved ceiling to have a smother curve, like the arch, split each segment of the brush in half before moving to the next step.
Be warned this will massively add to what the game engine is drawing and should only be done if fps is not an issue.
Cel6

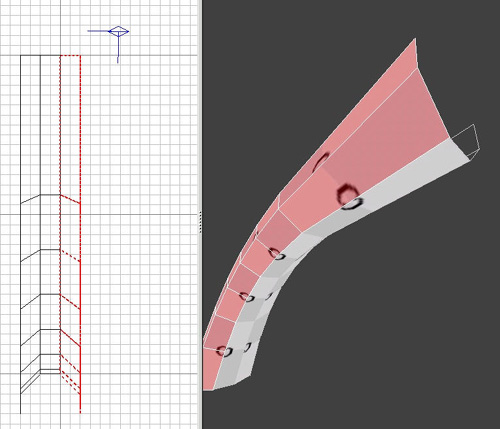
Step 13. ZY view.
Select the first segment of ceiling and the clipping tool. Place the clipping points two squares (1 unit) in from the edge of the arch, It is important that you use exactly the same points that were used to split the brush in step 12.
Repeat for all segments.
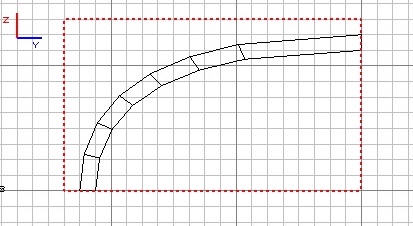
Cel7
You should now have a curved ceiling which looks like so.
Cel8
Step 14
With the grid still set at .5 move the ceiling brushes so the line up with the arches made earlier. If you do not use the small grid size when you have all the brushes selected, there is a chance they will realign them selves to the current grid size.
Cel9
Clip the brushes so they fit between the arches (still in .5 grid).
Cel10
With the brushes still selected, copy the section and flip on the x-axis and then rotate on the z-axis. Then place next to the second span.
This section can now be copied and rotated to make the full ceiling.
Cel11
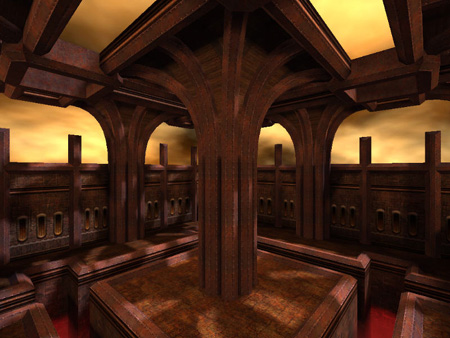
And your finished room should look something like this.
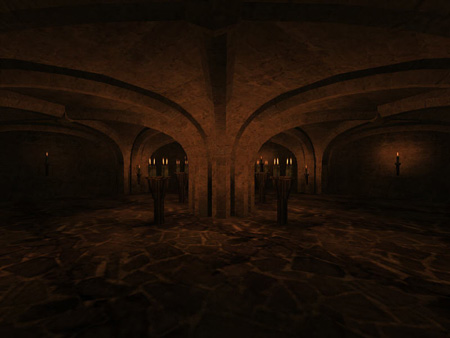
Good Luck!
Detoeni
Problems,
Comments, Queries > Forum
Tutorial by Detoeni
