|
First
Room
First up read the getting started
tutorial as this tells you how to use the camera and makes it a
lot easier and quicker to make the room. Also you need to download
the editor: Mohradiant
This tutorial will teach you how to make a basic room.
| 1. |
Set
your grid to a reasonable size, ive set mine to size 5 (grid
size 16) then save the map as "room" (if you are stuck
here, please read the getting
started tutorial before continuing)
|
| 2. |
Using
the top view (XY Top) create a brush 384x384x16
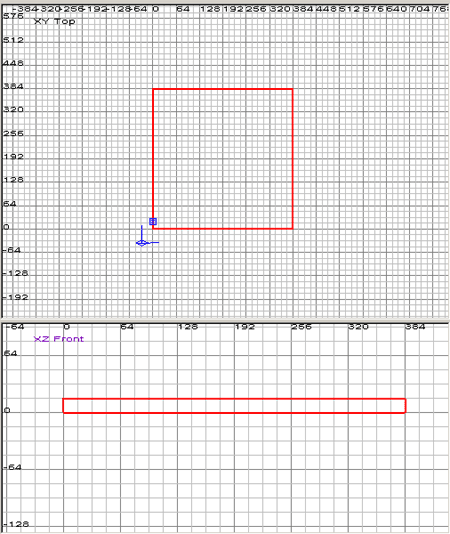
Fig 1.0
As we can see in fig 1.0 I have started our room, when making
future rooms dont worry about making things exact sizes and
measuring them out, theres no need too. Once you have made the
floor move onto the next step.
|
| 3. |
Now
we need to build the walls, make sure you have the floor deselected
(press escape or hold shift and left click the brush) now we
want to build 4 walls. To do this ive made a wall 240 units
high. If your having trouble understanding the grid remember
that you can look at the number values and if I am on the grid
size 16 then each small grid block is 16 pixels in size. If
im on grid size 32 then each unit is 32 pixels in size.
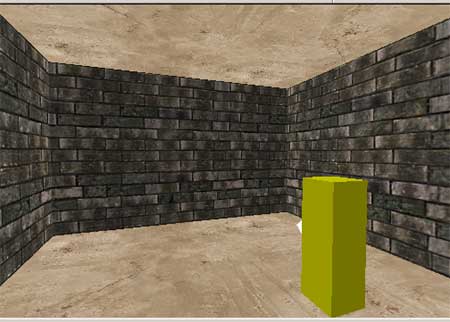
Fig 1.2
As we can see above I have placed one wall up. What you need
to do is make 4 walls like this one to make up the walls of
our room. For ease of use you may wish to select one wall and
press "spacebar" to copy that wall and place it on
the other side, rather than making another wall again. Spacebar
copies and pastes brushes in the editor and is very useful.
|
| 4. |
You
may of overlapped the walls, you would need to do that if the
room is visible from outside although you should triangulate
the edges, but since you are just starting mapping just do it
like below the image.
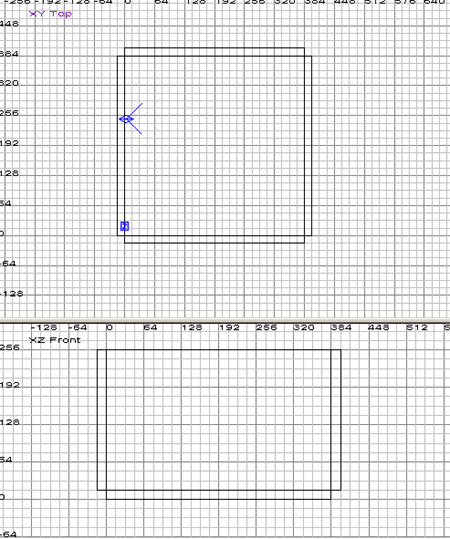
Fig 1.3
As we can see in fig 1.3 I havent fully overlapped the walls,
this is for the game engine as it doesnt like overlapped brushes.
It just makes the engine work harder and theres no need.
|
| 5. |
Now
we have 4 walls and a floor, next thing we need is a ceiling,
just select the floor and press "spacebar" then move
the brush up to the ceiling area or you can create the brush
yourself.
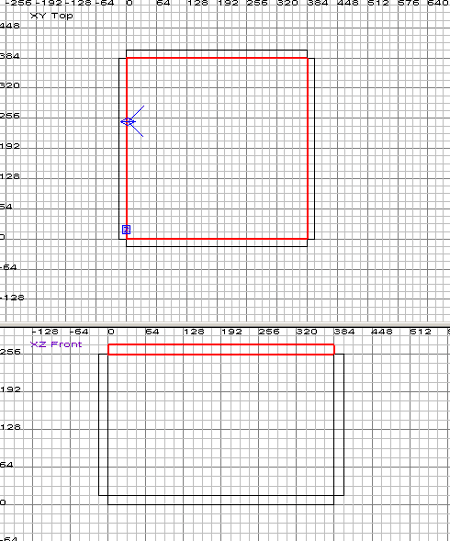
Fig 1.4
We can look at fig 1.4 and see the bare room finished. Lets
move onto step 6
|
| 6. |
In
order for your map to work in the game we need to have a spawn
point, we will use an "info_player_start" to put one
in your map you need to use an entity. Entities are pre coded
things you can place in your map, say you need to make a door,
well you need an entity to do that, so we need an entity to
be our spawn point. To get the entity menu"right click"
on a grid window, a menu should pop up like in Fig 1.5. Entities
are all sorts of things, from lights to spawn points to doors.
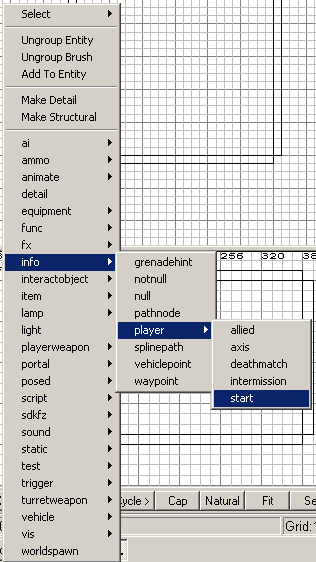
Fig 1.5
Now ive then went across to "info" then "player"
then "start" and left clicked. An orange rectangle
will now appear with "info_player_start" written on
him, this is our player, its also a good way to judge the size
of the map in relation to him, he may be a block but thats how
large in general he is.
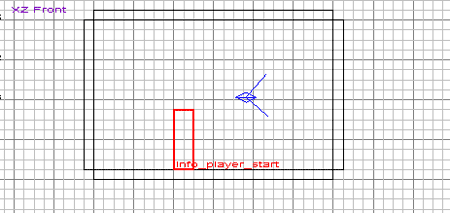
Fig 1.6
Place the info player start near the bottom on the floor, dont
put him into the floor as he will get stuck in game and wont
be able to move. So have him slightly above, he will fall down
automatically and land on floor without anyone noticing unless
you put him really high.
|
| 7. |
You
may of noticed the walls and floor of our small room are made
up of a blue and black texture, this is because we didnt load
any textures up.
So now we need to apply texture to the room. To do this first
select all the walls (hold down shift and left click in camera
view) then go to "textures" in the toolbar and scroll
down to "common" in here look for a texture called
"caulk". Now depending on your view, you might have
textures showing, if you dont press "t" to get the
textures window open. You may hit a snag here as the texture
window has no scrollbars on by default for some crazy reason,
so hit edit then preferences then at the top tick the box that
says texture scrollbar.
Now look for the caulk texture and click on it and the room
will turn into that texture. Caulk is a very important texture,
it tells the game engine not to draw the faces, therefore saving
on fps etc. So now we your room should look like fig 1.7 but
we still need to place what textures we want on the room.
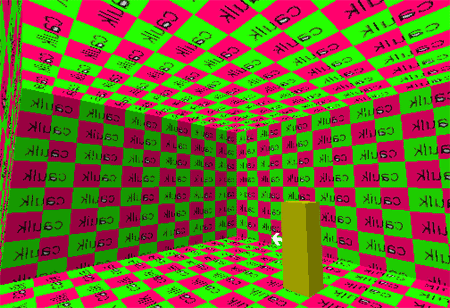
Fig 1.7
Pink and green, hmm nice. Now you need to learn some texture
basics. To apply to a face you need to "hold shift + control
and left click". It will only select the face you clicked.
Now select a face by "holding shift + control and left
click" and then go to "textures" on the toolbar
and then look for "central_europe" (you may need to
click on <up> first) now click that and it will load up
and it depends what window view you are on, you may have textures
displaying all the time on the editor if not on press "t"
to get the window up and then look for "church_interiorwall_drk"
then click that. Then if your in a window for textures press
"t" again to turn off the window, now left shift and
left click the brush to unselect it. It should look something
like Fig 1.8
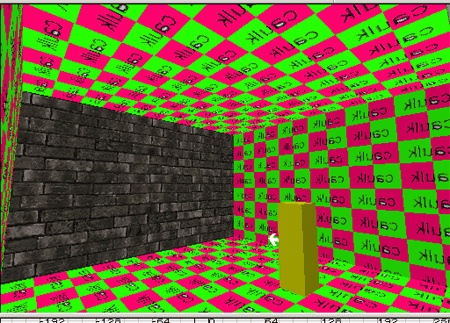
Fig 1.8
Now we need to apply the texture to the 3 other walls. You can
either do the method above OR a much easier way is to just select
another wall face by pressing "shift + left mouse button",
and then using the "middle mouse" button and put the
cursor over the already textured wall and click it, it then
also adds it to the current wall. Further still, once you have
done that ONCE you can simply look at the other walls in the
camera and middle mouse button when the screen is over them
and it will change the texture. If that sounds confusing just
use the method of texturing mentioned above this paragraph,
which was "hold shift + control and left click" open
textures, then central europe, then choose "church_interiorwall_drk".
|
| 8. |
Once
we have textured the other walls now we need to do the ceiling,
press "shift and left mouse button" on the ceiling
to select the face and now get up the texture window if you
need to (press t) and then find "tudor_set1w_exwall1flat"
now click that and turn off the window again if you need to
(press t) and we then need a floor texture, press "shift
and left mouse button" to select the floor and then apply
the same texture.
It should now look like fig 1.9

Fig 1.9
We are almost finished now, all we need to do is add a light,
so this is an entity, so right click on a grid window and find
"light". Put the light in the middle of the room,
you can press "n" which lists what entity is selected
and you can change various settings, but the light is ok as
is, so thats done.
|
| 9. |
Now
we need to compile our map into a bsp file. Its a simple process,
just follow the compiling tutorial |
by eyeronik
Other Medal Of Honor Tutorials:
Getting Started
Compiling
|