Simple Constructible Objectives
This tutorial will teach you how to make an entity that is destructable by one team and reconstructible by the other in W:ET.
- First, you need to create the item that you want to be constructible. For this example, I am using a fence prefab (See Fig 1.0). Note that the fence posts are patch meshes that are only part of the worldspawn.
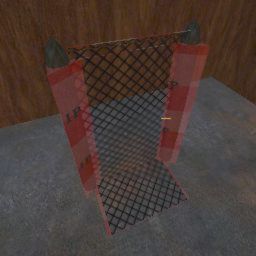
To follow along with this tutorial, you can download the fence prefab.
- Now, you have to make the proper entities.
First you select the brush (See Fig 2.0) that you want to be destroyable and constructible. Then, right-click in the 2D view and select the func menu and then select func_constructible
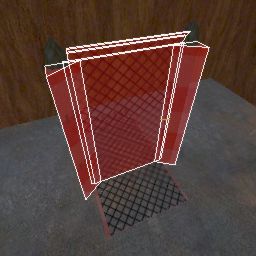
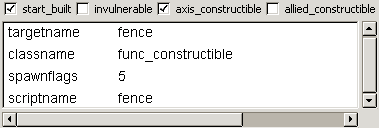
Now, while it is still selected, make a key ('N' to bring up the entity window) called 'targetname' with a value of 'fence'. Make another key called 'scriptname' with a value of 'fence'. To make it start constructed, check the start_built spawnflag, and then select either the axis_constructible or allied_constructible spawnflag depending on who you want to be able to build it.
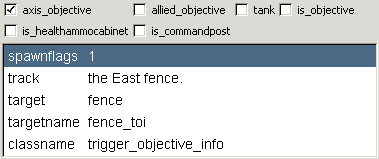
Now, select the brush that is to be the bounds of where the "You are near..." message will appear and of where you can construct it. Then, go to the trigger menu and make the entity a trigger_objective_info.
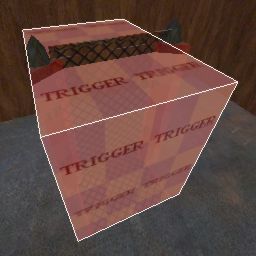
Next, you have to set the proper keys of the TOI. While selected, make a key called 'target' with a value called 'fence', a key called 'targetname' with a value called 'fence_toi', and a key called 'track' with a value called 'the fence'. Now, check either the axis_objective or allied_objective spawnflag, depending on who you want to be able to build it.
Next, you have to make the materials that will be used to construct the fence from. While the materials are selected (See Fig 2.2), go to the func menu and select func_brushmodel.
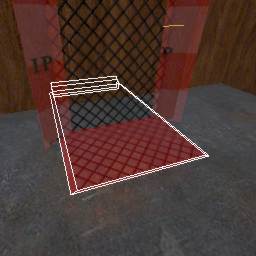
Give the entity a key called 'target' with a value of 'fence_toi' and a key called 'targetname' with a value of 'fence_materials'. The targetname will be used to show or hide the brushes.

- Now, the script section for the fence needs to be constructed.
fence
{
	spawn
	{
	}
	built final
	{
	}
	decayed final
	{
	}
	death
	{
	}
}
The spawn{} section sets the attributes of the fence, the built final{} section executes when the fence is built, decayed final{} executes when the construction times out, and death{} executes when the fence is destroyed.
spawn
{
	wait 200
	constructible_class 2
	constructible_constructxpbonus 1
	constructible_destructxpbonus 1
	setstate fence_materials invisible
}
The first line of the spawn section is to allow the fence entity to spawn before trying to set attributes. The second line sets the fence to be destroyable by a satchel charge (Change it from '2' to '3' to make it dynamite only) and the third line gives how much XP one gets for constructing it, while the fourth line is how much XP one gets for destroying it. The fifth line sets the materials used to build the fence to be invisible since the fence starts built.
built final
{
	setstate fence default
	setstate fence_materials invisible
}
decayed final
{
	setstate fence_materials default
	setstate fence invisible
}
Here, when the fence is built ( built final{} ), the fence is set to 'default', which means it is now visible. Also, the materials used to build it are hidden, since the fence was built using those materials. When the construction times out ( decayed final{} ), the materials are set to a visible state, and the fence goes back to being invisible.
death
{
	wm_announce "The fence has been destroyed!"
	setstate fence_materials default
}
In this section, which is executed when the fence is destroyed, announces ( wm_announce "" ) that the fence has been destroyed, and makes the materials that are used to build the fence visible once again.
- Conclusion: While the fence example shown here is relatively simple, constructibles can become much more complex. One example would be a constructible that has three different stages in which the last stage of the construction is different depending upon which team is building it, also causing the construction to be either destroyable by satchel for one team, or destroyable by dynamite for the other.
- Notes
- All brushes dealing with the func_constructible should be made detail (Select the brushes, right click on the 2D view, and select 'Make Detail' or use the keyboard shortcut Ctrl+M).
Problems, Comments, Queries > Forum
Tutorial by WeblionX
HTML cleaned by WeblionX

