Manipulating
Brushes
Here we are going to discuss "dragging edges","dragging
vertices" and "clipping" these actions can change
the shape of brushes and create many different shapes and variations
of a brush.
Dragging Edges
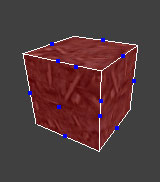
This is a useful tool for making slops and various shapes, to use
it you need to have your brush selected and press "E"
then several blue dots will cover your brush
 |
 |
| Fig 1.0 - Cam View | Fig 1.1 - Top down view |
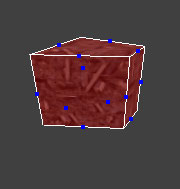
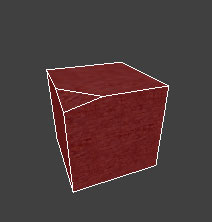
If you try moving some of the points you can see that the ones on the edges of the brush can move the sides along (and the ones in the middle parts will move all the side along, you can see what I mean if you try it), ive moved the top right blue point over a square, so to speak (64 in grid numerical value, with grid on 16):
 |
 |
| Fig 1.2 - Cam View | Fig 1.3 - Top view |
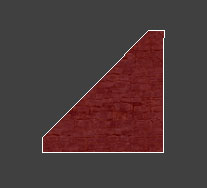
You can make a variety of shapes using this tool, many of which you can also make with the clipper tool, which in a lot of circumstances the clipper tool is more efficient, especially since with this drag edges method you cant merge the points, it really depends on what your trying to create. If you see the above image Fig 1.3, if I wanted to move the top right blue point fully to the left to make a triangle I cant, as it wont allow it. So for that you need to use the clip tool, which is a simple affair of clicking 2 points and pressing enter, you can read how to do clipping on this page here
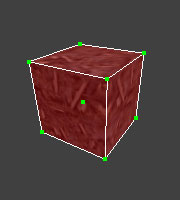
Dragging vertices
Probably the less used method, to drag vertices have your brush selected and then press "V", this will make green dots appear on the corners of your brush.
 |
 |
| Cam View | Top down view |
You can move these green dots around to make the brush change shape, moving these points means only one corner moves along at once, so it can prove difficult to make shapes and seems only useful if you need to make really complex shapes, you can make the same brushes using the clipping method and the dragging edges method faster than using this, but it depends what you need to make.
2 Point Clipping
Clipping is an essential part of mapping if you want to create sloping brushes and various other shapes. Its easy to do, all you need to do is have your brush selected and then press "x" now if you click where you want to start the clipping a blue dot will appear with a 1 above it:
Then you need to place another blue dot where you want the clipping to end, it will be named 2 and a yellow line will appear as you put it in, then if you press enter and it will clip the brush:
 |
 |
| Top View - with points chosen | Top View - after you press enter |
You can also move the points about when you have put them in, just click and hold either point and the yellow outline will move around the shape as you move a point. You can see that the yellow outline is going to be the final shape, anything not in the yellow line will be lost. Ive used the top view in this case, but you can use any view to clip or drag edges or vertices, like the height (z) view. Obviously you can clip or drag a brush as many times as you wish.
3-Point Clipping
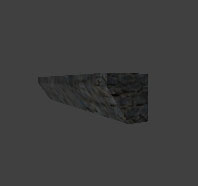
This has the same basic principles as 2 point clipping, in that you place points, the difference is you can place 3 points in this and its more difficult to make things, you can imagine you can cut off segments so to speak with 3 point clipping:
 |
 |
| Camera view | Z View |
 |
|
| Top down view |
If your just starting out mapping you might want to leave 3 point clipping to later, you might not need to use it much anyway, it all depends on what you want to create.
Important note!!
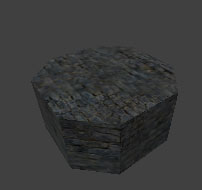
You can make a variety of different shapes, but they need to be sensible, you cant make any shape you feel like as the engine wont like some you make and you will get errors during compiling, (you could try clipping and moving a few verticals, then compiling to see if your shapes are valid, this way you might understand more what is acceptable and what isnt) Just so you get some idea if you havent mapped before at all, I quickly made a few fun shapes:
 |
 |
| Cam View | Top View |
 |
 |
| Cam View | Top View |
 |
 |
| Cam View | Top View |
Problems, Comments, Queries > Forum
Next Tutorial > Texturing
Tutorial by eyeronik
