Making Curves
Curves are a great feature to rtcw. You can make various things from simple cylinders to curved walls, floors and corners. Most of the time when you need to make some sort of corner piece you will need to create a brush, then turn it into a curve of some sort. Most curves have only one side on view, you can turn them around to have which side you want on view, and you can have both sides on view if you need to. Curves also are more complicated than the average brush, so they will lower fps more, so bare that in mind. Often using the caulk texture behind a curve is a great way to optimise your map. We will discuss how to make curves and what im banging on about further down the page.
Curve menu explained
As we can see in fig 1.0 this is the curve menu. Lets see what each part means.
Cylinder
You need a brush already selected to make a cylinder. Create a brush in top view the size you want the cylinder to be and then select cylinder and one will be created, its quite simple, see fig 1.2

You can then rotate your cylinder using the rotate buttons (Fig 1.3) on the toolbar, its not a good idea to manually rotate it as it wont line up correctly and causes errors so only use the buttons.

More cylinders
This is the same as the cylinder but it performs what it says, dense cylinder, square cylinder and very dense cylinder, you might not notice a change in the cylinder no matter what you pick, unless its quite a large brush you have made.
End cap
This creates a U shape, you can use this as you see fit, you can also create arches using this.
Bevel
This creates a mesh piece for use with putting in curves in corners and things. If you create a brush and then press "bevel" you will get a shape like that of Fig 1.4
You will see its only got one side thats viewable and that you can rotate it using the rotate buttons, do not rotate manually, always use the buttons (see fig 1.5)
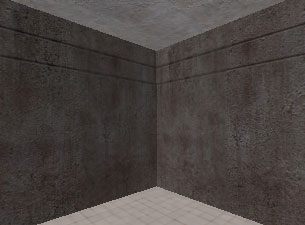
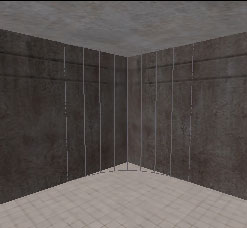
A common thing that is often produced using the bevel is curved corner piece's. Say I have a boring wall I want to make more interesting like in fig 1.6
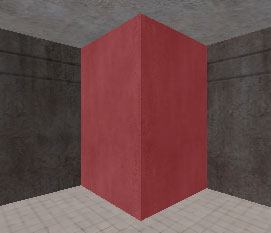
Now I want to have it curved. All I need to do is pop in a normal brush like in fig 1.7
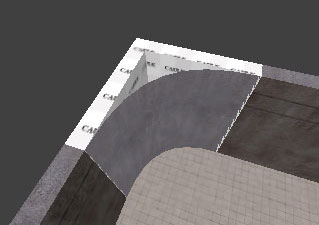
Now I need to open up the curve menu and find "bevel" and then press that and it will turn into this (Fig 1.8):

This however for me is the wrong way, I dont want it like that, so I need to rotate it using the rotate buttons (see fig 1.5 previously)I pressed the Y|Y then X|X for mine to be rotated correctly, however it looks like this (fig 1.9):
This is not what we are wanting is it, as we can see there is no face on this side, we want the other side to be visible, so to do this all we need to do is select our curve, then open the curve menu again the chose "matrix" and then "invert" or you could press "ctrl and I" if you like shortcuts, see Fig 2.0.
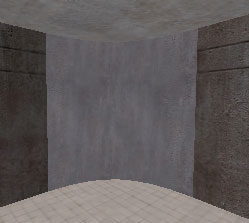
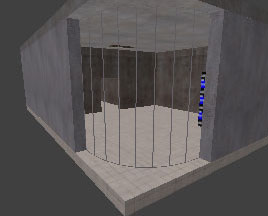
Now there you go, apart from the texture thats what I wanted a curvy bit at the wall. What you must do now is some caulking, this optimises things as at the current state of things its still drawing whats behind the curve, resulting in lower fps. So its quite simple, just pull back the walls to the ends and put in some new brushes made of caulk.
So you can now see how to make that type of bevel. We didnt line up our texture though did we, and for patches like this you need to use the patch surface inspector, to get this hold "Shift" and press "S" its much like the normal surface inspector, see fig 2.3

So its virtually the same as the normal inspector only this is for curves and patches. (If you dont know how to use that, see the texturing tutorial) it can prove more difficult to align textures on curves.
More endcaps
Just like the end cap only here we have different shapes of it.
Cone
Make a brush, then press cone and there you have yourself a cone
>Simple patch mesh
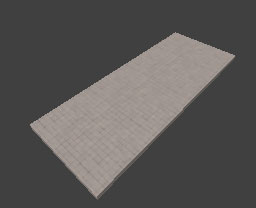
This is often used to make floors and ceilings, but you can make anything you see fit. You need to create a brush, then chose simple patch mesh, a window will pop up asking what size you want, normally the default is ok for most things so just click ok. Ill quickly explain how to make a curved road, first you need to make your piece of road, see fig 2.4
Now we select it and chose "simple patch mesh" then chose ok in the pop up box as 3 x 3 is fine, it doesnt matter to much about that. Now what you need to do is press "V" and some dots will appear like in fig 2.5
Now you need to move those dots to make your curve, im going to curve to the right so ill move the dots over to the right at the top, ill also move the sets of dots in the middle see fig 2.6
As you can see ive moved all the dots using top view apart from the bottom 3 ones as there ok. You would then probably need to make more patches around it, but hopefully you understand the jist of simple patch meshes now.
Insert
These are for patch meshes mainly, you can insert rows and columns using this. You can also use the delete part to remove columns and rows. Note this doesnt always work for every patch, some you cant add or remove anything due to there construction.
Matrix
Invert
This will move the visible face around to the other side of the patch.
redisperse rows / columns
self explanatory, not used that much to my knowledge.
Cap selection
This basically fills in the parts relating to the cap you have chosen from the menu that pops up. Useful for arches too, can create the front and back peices for it
Overlay
Set and Clear
You can move the patch around and make it bigger and smaller, clear, clears the selection
Thicken
This effectively turns your thin patch into a more brush like patch, it gives it sides and a bottom.
Useful curve tips
- Always put caulk textured brushes behind bevels etc where possible.
- Hold "shift" and "s" to bring up the texture inspector for curves
- If a texture has become all stretched try capping it or choosing natural or try pressing ctrl, shift and n
- Patch meshes and various other curves go a darker colour in the editor, they look the same colour in game
- Curves and meshes dont cast shadows, so if you need to have them casting a shadow, try making a brush inside the curve or bevel out of the caulk texture and then it will cast a shadow of that.
